


When my mom moved into a retirement home, we wanted it to feel like home to her. I spent an afternoon with my brother hanging a collection of old family photos onto her wall. When we realized that so many small photos had the potential to make her room very chaotic, we needed to be deliberate – and ruthless – to make the space look good. [disclaimer – all of these blog snapshots are taken with my iPad and look slightly distorted]. 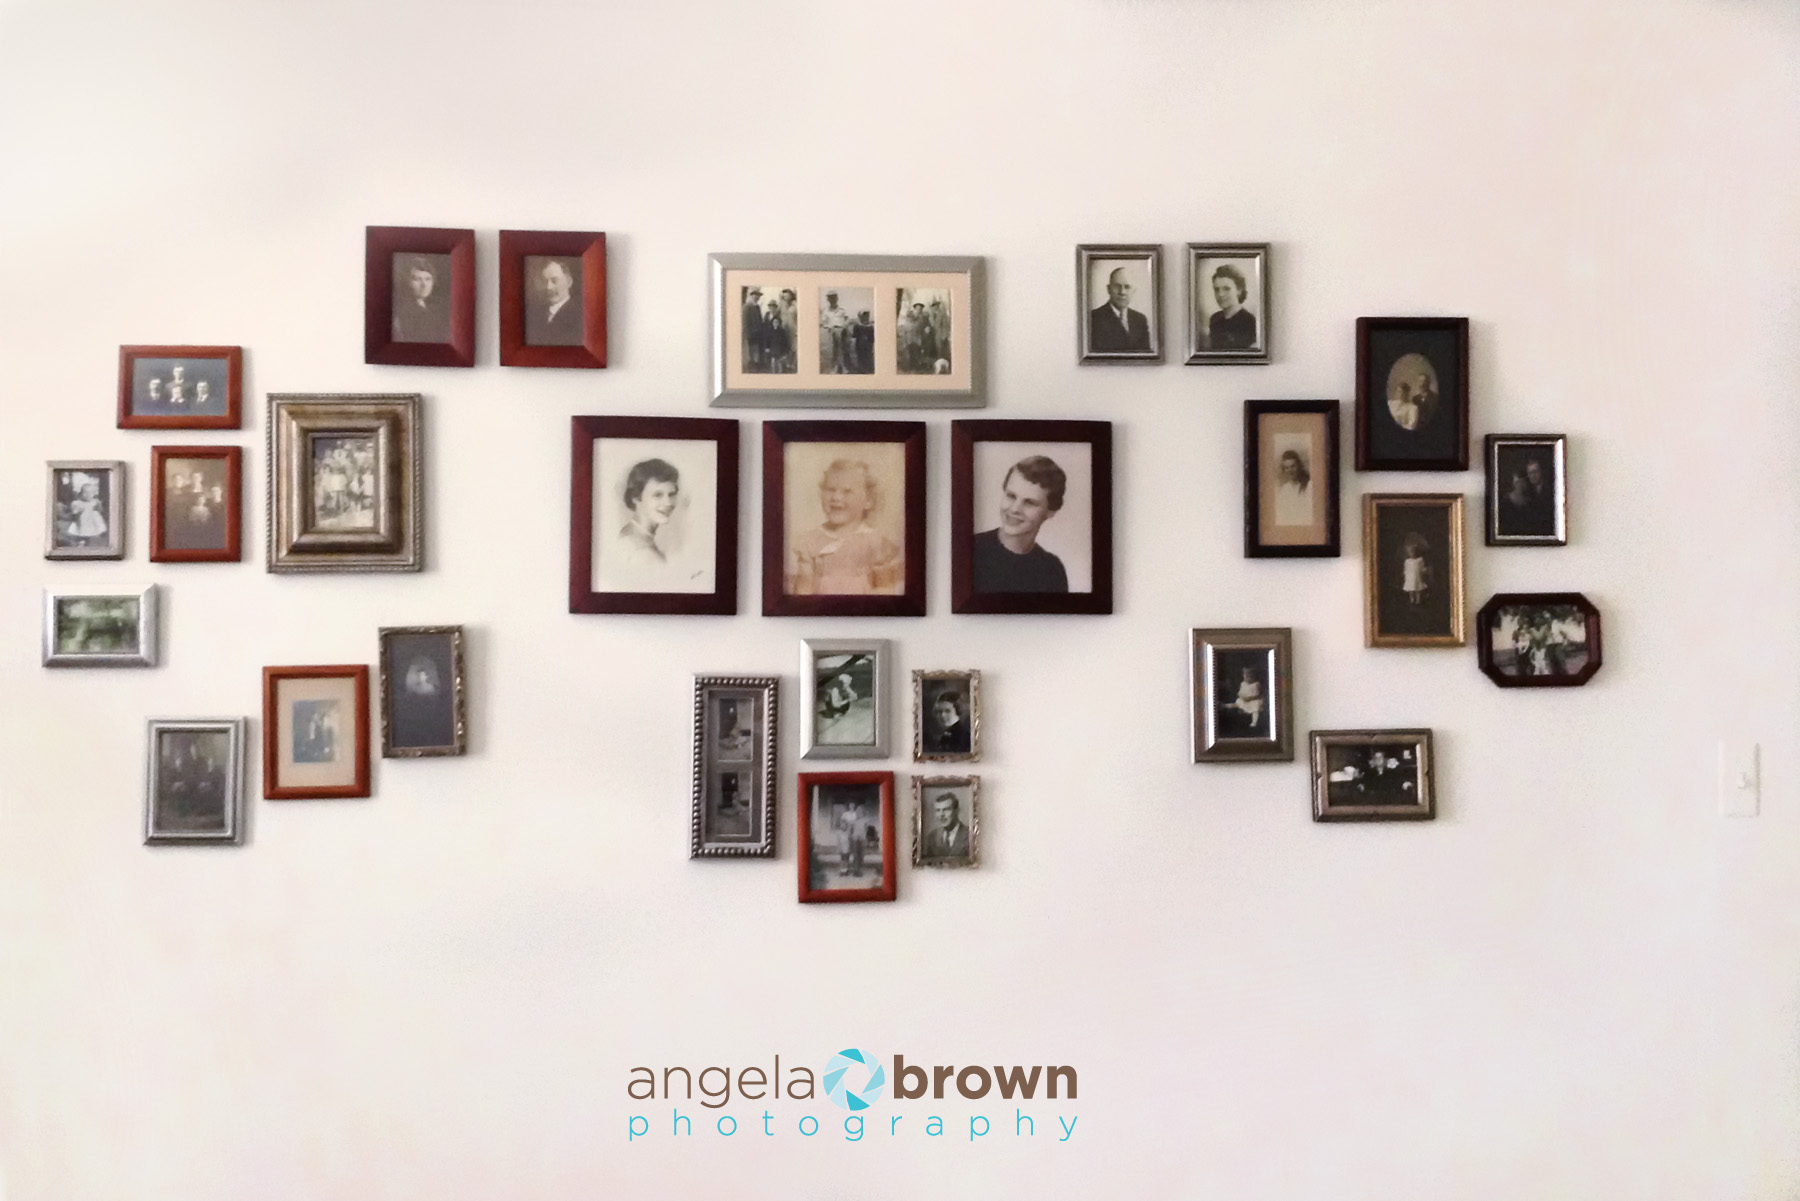
Here are five rules for arranging your old family photos:
-
develop a theme for your frames
I hate things matching too much, so I chose three main frame colors – a muted pewter, deep mahogany and a few medium toned wood frames. Anything more would have looked chaotic. In our case, some were off-the-shelf frames, and other photos were custom matted and framed.
-
lay it out before nailing it up!
All the pieces that had a chance of going up on the wall got first arranged on the bed. I’d probably suggest using the floor instead, but at the time, the bed just seemed, well, convenient. This helped us see which photos shouldn’t make the cut once we did our design.
-
find a focal point
Mom had dozens of small photos that she wanted to display. Unfortunately, none of them were over 8×10. So, I used the three 8x10s together in the middle, arranging them side by side and fairly close together. This gives the viewer a place to focus first. All three images are portraits of my mother, they were the biggest frames, and we framed them identically. It’s the focal point.
-
use multiple pieces to create one “unit”
Using smaller groupings, I arranged them to show the illusion of larger pieces. Along the top are companion portraits of my grandparents and great grandparents. They were framed and arranged together, and the couples are placed opposite each other. I also took some coordinating photographs and had them placed in one frame. Finally, small groupings were placed together, like the six small photos in the bottom center.
-
give the eye a place to wander
This is a biggie. You definitely don’t want an endless maze of frames! In my mother’s display, your eye starts in the middle and wanders up and around the left side of the group, ending back in the middle. Then, you go back up and view the right side in a clockwise fashion, ending in the lower right. The eye has a path to follow, and it finds places to rest.
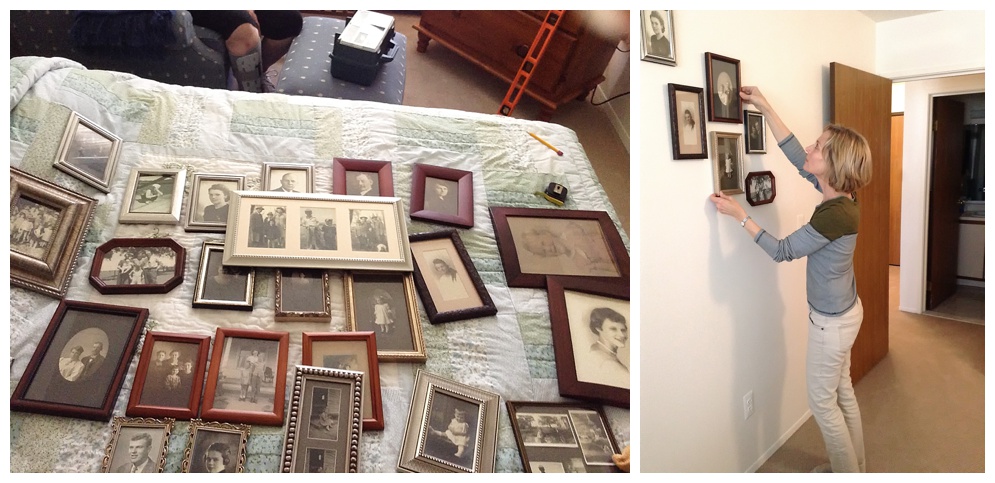 Putting the display up was a two hour project at least, and that was after time was taken to select proper frames. [Those closest to me know that I can OBSESS over things like selecting the proper frames!] However, hanging out with my mom and brother [and wisely equipped with a ruler, pencil and a level] made the afternoon a great experience. 🙂

Angie is a brand and headshot photographer serving the Ann Arbor, Brighton + Howell, Michigan area. She works with entrepreneurs to create strategic, personality-driven branding images that elevate their visual brands and attract their dream clients.
In her studio, she also crafts polished headshots for professionals and executives who want to show up with confidence.

